

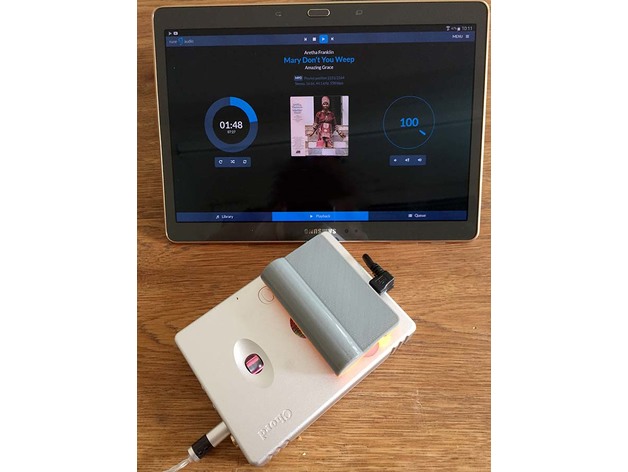

This is a portable music streamer/player with a Raspberry Pi Zero W. Stream music/radio stations, play local stored files, create a media server, use it as a portable Raspberry Pi Zero W case.
Hardware cost 20 usd + microsd card + printing cost ~30 usd :-).
I use a minimal linux version from RuneAudio (http://www.runeaudio.com/) to stream music from my nas/local storage to the dac, using my phone with bubbleupnp/webbroser/rune app to control the dlna renderer/airplay/local media player.
Of course you can use any Linux version that works with the Raspberry Pi Zero W.
Soldering experience for small parts and experience with the Raspberry OS needed (flash sd card, setting up, config adjustments).
Look at http://www.runeaudio.com/forum/raspberry-pi-zero-support-in-0-4-t3711.html for RuneAudio and Raspberry Pi Zero.
Technical specification:
Size: 82mm x 53mm x 11/22.5mm
Weight: 78.5 gr
Battery: 3400ma
Boot time: ~30 sec
Runtime streaming music: ~13 hours
needed Hardware:
1 Raspberry Pi Zero W board – 10 usd
1 18650 powerbank (step-up converter / charger) – 2 usd
1 18650 lithium ion battery (max size 65.6mm x 18.5mm) – 6 usd
1 Powerswitch – 1 usd
1 128/xx gb micro sd card with RuneAudio image – 8 usd – xx usd
Install the RuneAudio OS on the microsd card and test the installation, use a wall adapter and a mirco usb cable. If everything is fine expand the rune os partition to use the full space of your micro sd card (https://raspberry-hosting.com/en/faq/how-expand-arch-linux-root-partition). Use sftp to the /mnt/MPD/LocalStorage folder to transfer your music files.
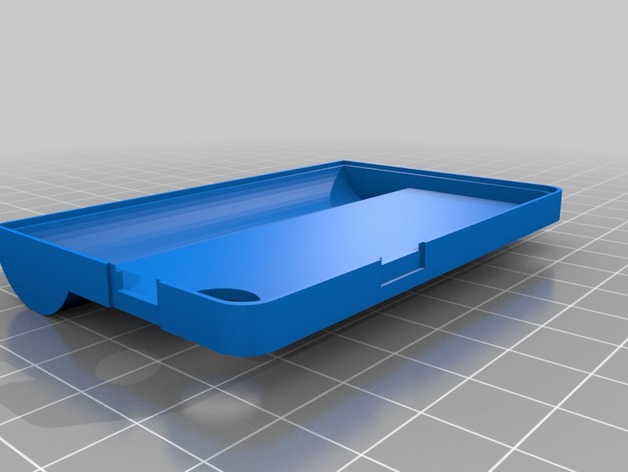
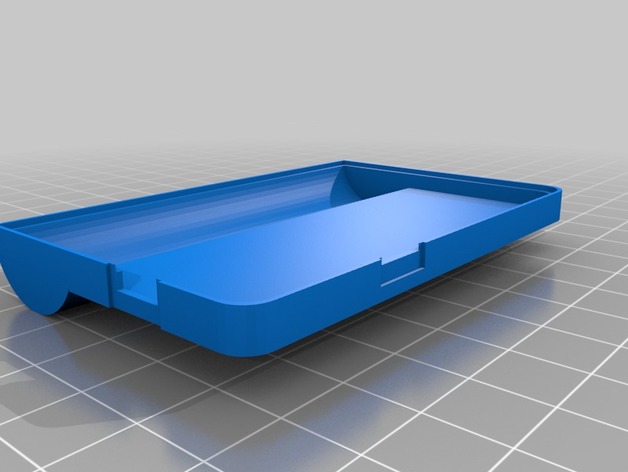
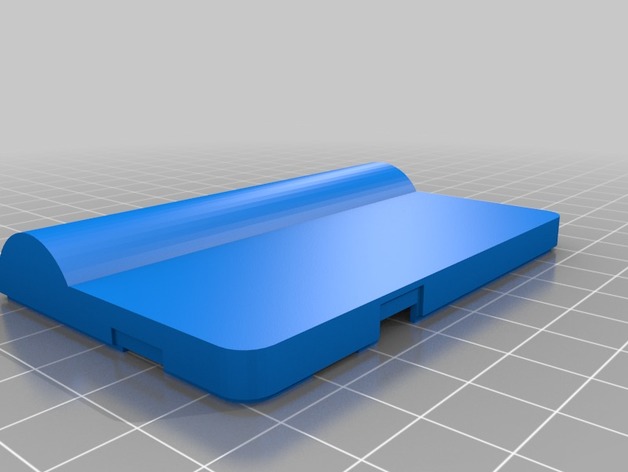
Print the case, test if the two case parts fit well, some afterwork may be needed (depends of the print quality). If everything is fine glue the window in with superglue.
Remove the powerbank board and desolder the big usb connector and the two battery connectors. Solder two cable to the powerbank pcb – place of the big usb connector, pin 1 (positive – orange cable) and 4 (ground/negative – white cable) (power out to the Raspberry Pi Zero W), secure them with 2 component glue.
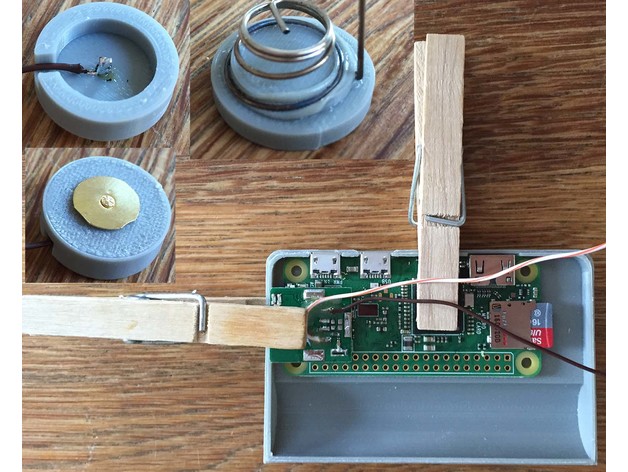
(Read this first and test the placement before using the glue) – Take the Raspberry Pi Zero W and place it in the down case, they should securely fit via the two micro usb ports cut-outs. Use a small amount of 2 component glue and put a small amount on the top of the camera connector. Now you take the powerbank pcb, put some glue on the ferrite part and place it so that it fit the charging micro usb cut of the case, use 2 clothes pegs, wait till the glue is cured. When the placment was right and fits well, use hot glue between the Raspberry Pi Zero W and the powerbank board for a secure fit. You can now solder the two cables to the Raspberry Pi Zero W board (google search “raspberry pi zero pinout”), using a longer positive cable and cut them appart for connecting the power switch later.
Take the Raspberry Pi Zero W out and solder the micro usb cable to the underneath of the Raspberry Pi Zero W board, use the golden test points (test the length of the cable first). Secure the cables with 2 component glue.
Make a cut out for the powerswitch (down case), use a rasp. Solder the powerswitch to the positive cable.
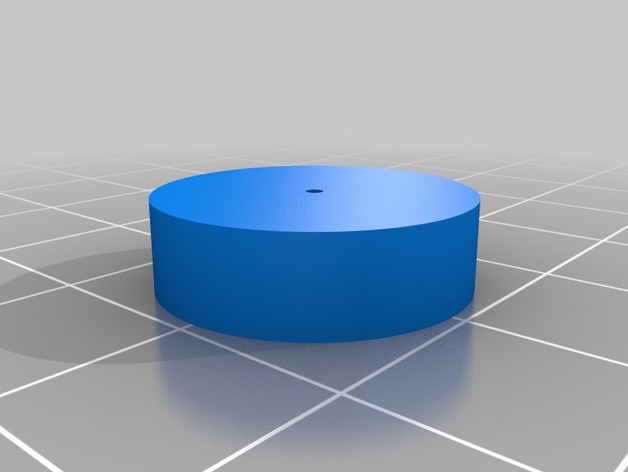
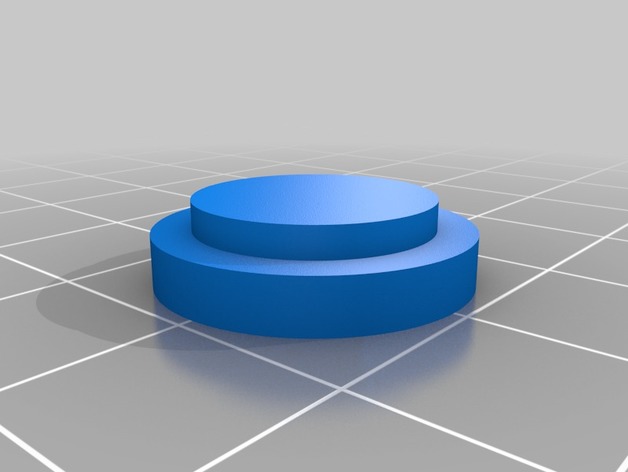
Prepare the two battery bases, use the spring from the powerbank and solder a cable to it, heat it up and place it on the base. For the other base use a puntine, remove the plastic cap heat it up and stick it through the hole, solder a cable to it.
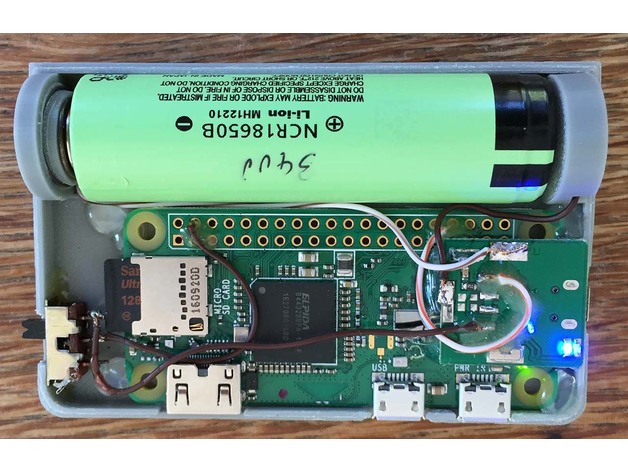
Solder the battery connectors to the powerbank board and test your work, everything should work now.
Secure the powerswitch in the case with 2 component glue (only underneath). Put the battery and Raspberry Pi Zero W in the case and test if the case can be closed. If it is fine, secure the Raspberry Pi Zero W board with 4 drops hot glue in the case (so you can remove it easily if needed).
Close the case using superglue.
Use aceton for smoothing out the case if you want.
If you want to use the case for other projects, open the hdmi port with a rasp, you see the size marking inside the case. Don’t open the micro usb power port, you can only use this port if the power switch is off or (better) the battery is secured with an additional diode, DANGER OF FIRE DUE TO BATTERY OVERLOAD.
Print Settings
Printer Brand:
Zortrax
Printer:
Zortrax M200
Rafts:
Yes
Supports:
Yes
Resolution:
90 microns
Infill:
no
Credits:
rumina
Download 3D models
| File | File size |
|---|---|
 Raspberry_Pi_Zero_W_portable_18650_case_-_media_player___streamer
|
572 KB |