
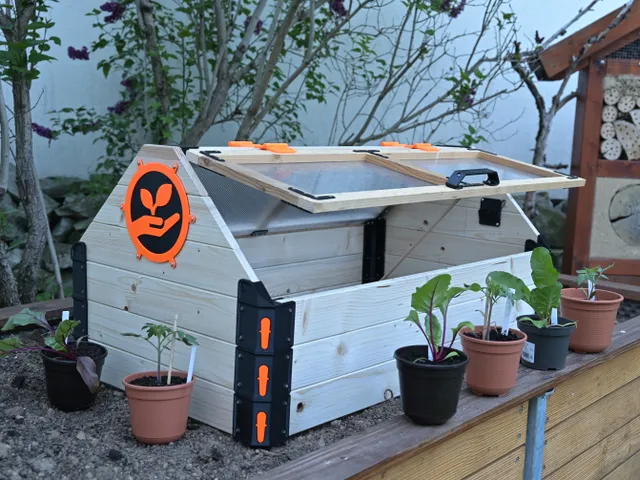
The modular construction allows you to adjust the greenhouse to your needs (instructions with dimensions at the end of the text for the greenhouse shown). The combination of wood and 3D printed parts makes this possible.
The length of the boards determines the size of your greenhouse. The corner modules connect the boards to a frame. You can then stack the frames on top of each other as you wish. The individual frames are connected by a locking mechanism. The mechanism consists of a 3D printed spring and a lever (if you only want to test the mechanism, you can print test components from the test folder).
The last module you can add is a roof that you can open from two sides. The hinges used are also 3d printed parts and can be printed as a single part. The tight tolerances guarantee a secure guidance of the roof flaps. The crossbar is inserted via a dovetail. The fittings (logos) connect the boards of the roof gable.
With the earth spikes you can place the greenhouse securely in the patch.
Alternatively, you can install a floor. In the future there will also be a frame so that you can place the greenhouse as needed. (Not yet satisfactorily implemented due to time constraints)
The boards used for the frame have a height of 80mm and a width of 18mm. The roof slats of the roof flaps have a height of 35mm and a width of 16mm.
I have provided you with all the step files so that you can adapt the parts to your case if necessary. If you have any questions about this project, please feel free to contact me and I will do my best to help you with your own project.
Details of the Greenhouse shown:
General Info:
Length: 1000mm
Width: 570mm
Height: 480mm
Weight: 10.5kg
Instructions:
!! Be advised: “two plates that are also to serve as indicators” were reworked in 0.1 Update Greenhouse (basic) – revised “plantindicator” so pictures might differ a little !! Nothing mayor though ;D
Credits:
KERLE MAKERSPACE
Download 3D models
| File | File size |
|---|---|
 diy-greenhouse-by-kms-other_files
|
105 MB |
 Assembly
|
2 MB |
 TechnicalRefrenceGable
|
66 KB |
|
DIY GREENHOUSE by KMS_Changelog
|
574 KB |
|
diy-greenhouse-by-kms-model_files
|
110 MB |