
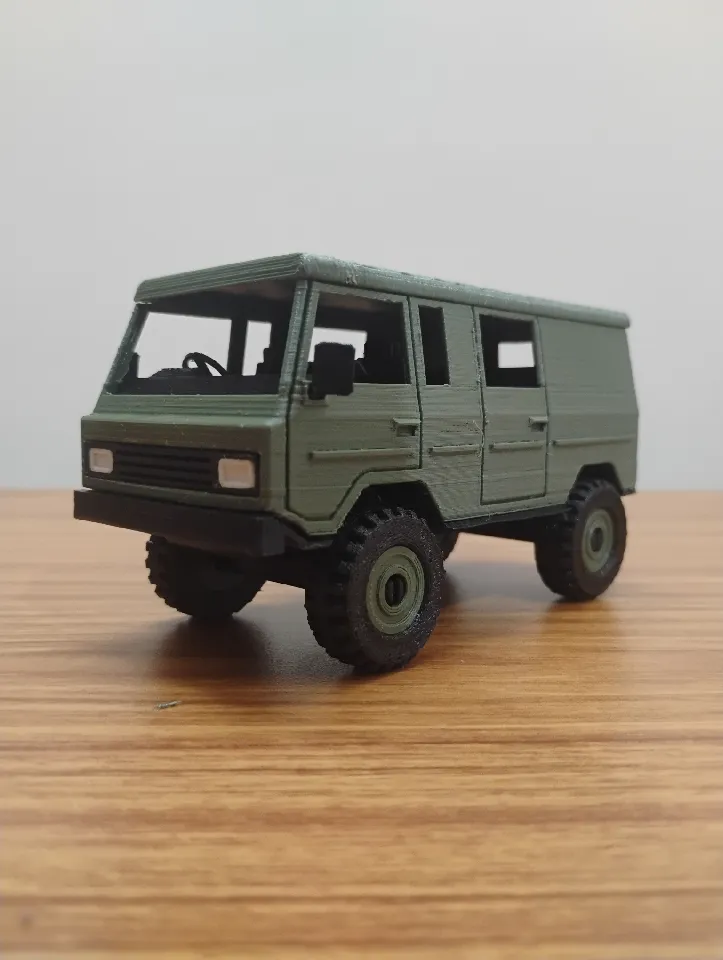
This is a 3D printable scale model of an off-road van inspired by the legendary Volvo C303 – a military-grade workhorse known for its rugged design and go-anywhere attitude. Designed with clean lines and simple assembly in mind, this model is perfect for display, diorama builds, or collectors of vintage and military vehicles.
Parts to Print:
Print the parts as per the list. Use recommended colors for best results.
Part Name |
Color |
Quantity |
| Axle | Black | 2 |
| Cab | 1 | |
| Chassis | Black | 1 |
| Floor | Black | 1 |
| Grill | Black | 1 |
| Head Light | White | 2 |
| Rear View Mirrors R | Black | 1 |
| Rear View Mirrors L | Black | 1 |
| Rim/Rim for TPE Tire | 5 | |
| Roof | 1 | |
| Spare Wheel Holder | Black | 1 |
| Steering Wheel | Black | 1 |
| Tail Light | Red | 2 |
| Tire/TPE Tire | Black | 5 |
Print Process:
Position the parts in slicing software with orientations shown in the following images. Correct orientation is important for printing without additional support.
Color Parts:
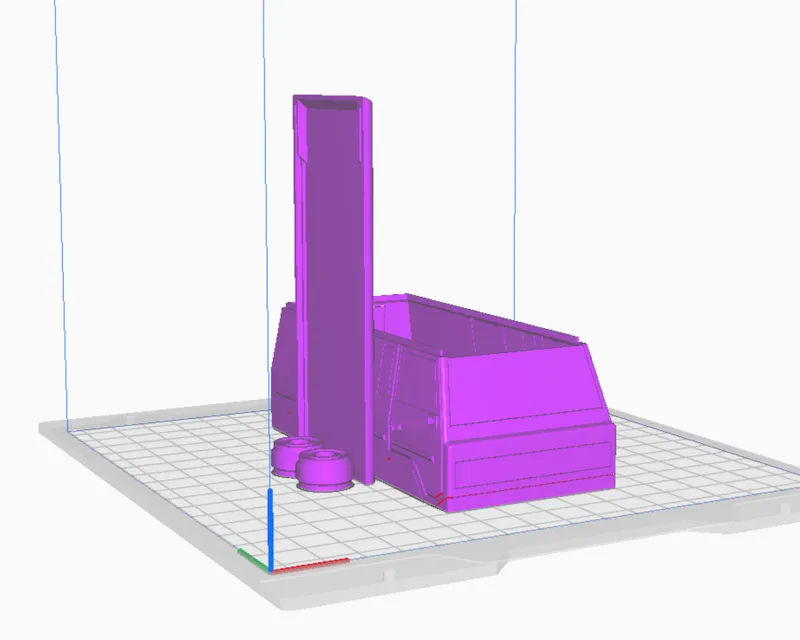
Black Parts:
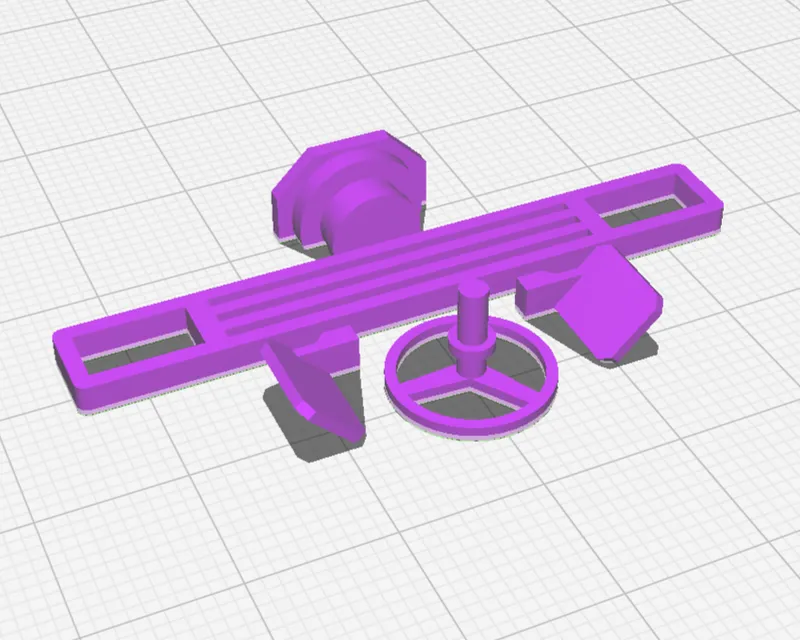
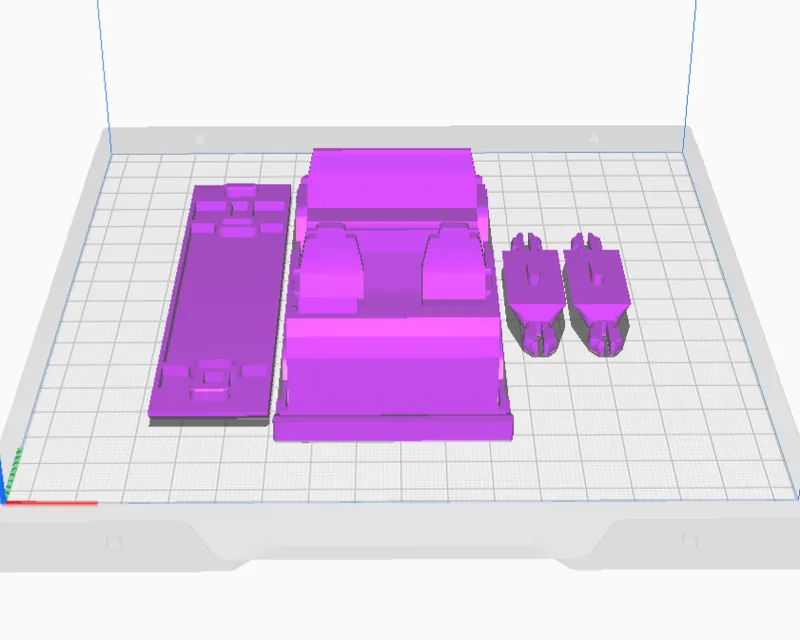
Print Settings:
The model is designed for printing with a 0.4 mm nozzle and requires no additional supports. Use the printer-specific settings for the best quality prints.
Layer Height: 0.2 mm
Infill: 15–20% is sufficient for most parts
Supports: Not required. Orient the parts as shown in the images above.
Material: PLA recommended; ABS or PETG also compatible
Bed Adhesion: Brim optional for Cab and Roof.
Post-Processing:
The prints may require finishing before starting assembly. The process involves removing the in-built supports, stringing if present, and smoothing the rugged edges. You may require the following tools as per preference and availability:
- Cutter or Knife
- Sandpaper or Small Files
- Adhesive (SuperGlue)
Assembly Instructions:
Watch the following video instructions for the model assembly. Check for tolerances before assembly. Use the appropriate tool for sizing the joint members. The press-fitting of some parts may require force. Use pliers or a vice for fitting, if necessary. In case any joint feels loose, use adhesive to fix the joint.
Credits:
Hobbyist Engineer
Download 3D models
| File | File size |
|---|---|
 32-scale-model-c303-model_files
|
1 MB |