


Please vote on this project for Instructables Microcontroller and Pocket-Sized Contests! 😀
If you invested some money in crypto coins, you probably already know that they are highly volatile. They change overnight and you never know now much ‘real’ money you still have in your wallet. The same is valid for stock markets. You put a little faith in a particular stock and, out of nowhere, the market thinks it’s worthless the next day.
So how do you track these assets and know their current value? You can work with some spreadsheets and update them regularly. Or you can create your own gadget to check these values for you: an IoT wallet!
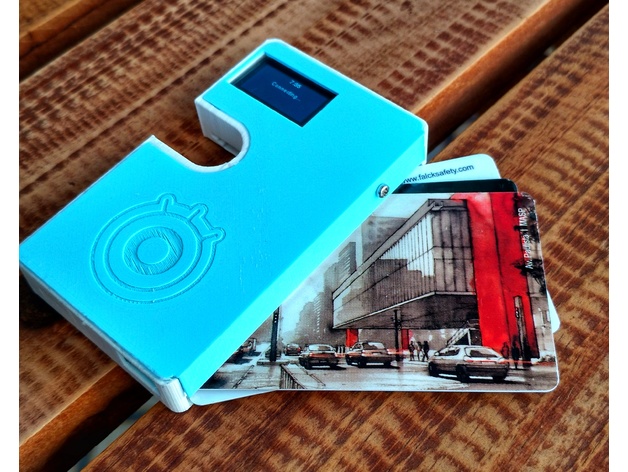
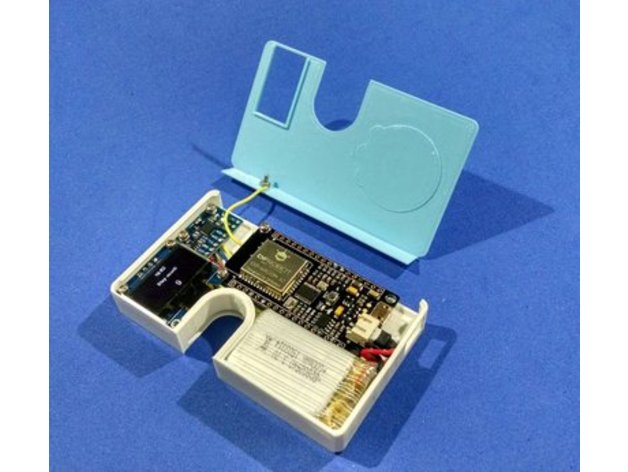
For this project, I worked on the Google spreadsheet to track my assets and update their values for a particular currency, based on the ticker values retrieved from the Internet. This spreadsheet is accessible from an ESP32 using and Wi-Fi connection, and a summary is shown on an OLED display. A 3D printer was used to create a wallet, in which I embedded some electronic components to create my first IoT wallet prototype.
Did you know you can buy a Creality 3D CR10 for only $359.99? Get yours at Gearbest.com: http://bit.ly/2JIUVrf
Full instructions at:
https://www.instructables.com/id/IoT-Wallet-smart-Wallet-With-Firebeetle-ESP32-Ardu/
Print Settings
Printer:
Voolt3D
Rafts:
No
Supports:
No
Resolution:
0.2 mm
Infill:
10%
How I Designed This
The wallet was designed to hold three cards and some electronics (microcontroller, display, and battery). An elastic might be used for holding additional doccuments and maybe some paper money. It was desgined using Fusion 360 CAD software.
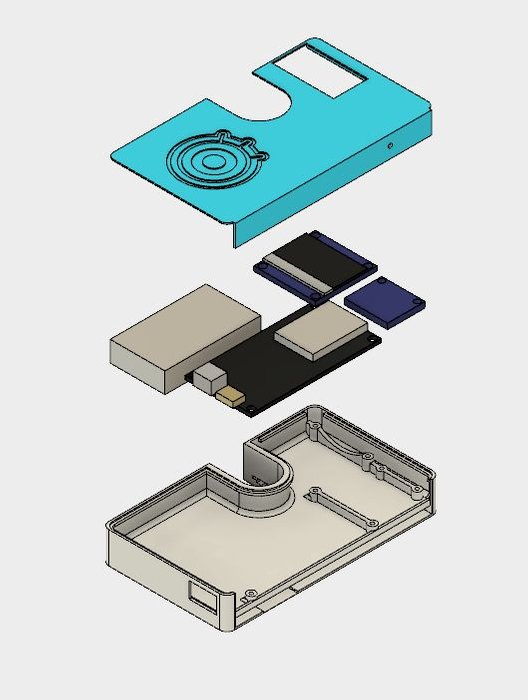
The model is composed of only two different part: cap, body. I’ll detail how I drawed each of this parts, in case you want to replicate it on your own design.
Components
First I made a simple representation of each component used on my wallet. They don’t have to be very detailed, but should have the right measurements. This was important to help define the relative position of each component inside the wallet. This way, I had to create a model for the ESP32 Firebeetle, OLED display, battery, and of a standard credit card.
Arrange the components
With a model of each component, you can play with their position and choose the best position for each one. I wanted to create a gadget as slim and as small as possible. This way, I tried to organize the devices to use a footprint close to a standard credit card area.
Drawing the sketches
After choosing the location of the instruments, the sketches were drawn and the structure was extruded.
The model was divided in two parts: the body of the wallet and the front cover. The body has holes for the bolts for the installation of the electronics. It also has hole that allows connecting an USB cable to the microcontroller (for uploading a code or charging the battery). It was were designed usin 0,8 mm walls, and have space for 3 cards. The front conver is glued to the wallet, protecting the electronics. It also has a hole for the touch button.
Credits:
igorF2
Download 3D models
| File | File size |
|---|---|
 IoT_Wallet
|
733 KB |