
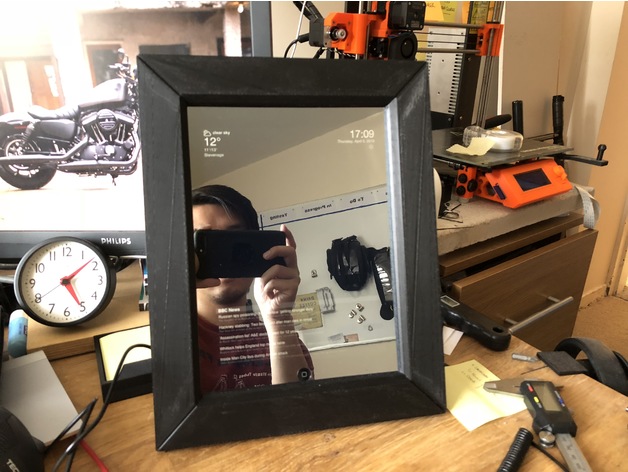
This is a frame kit for the 1st Generation iPad. I had an old iPad sitting in a draw for years and decided to turn it into a smart mirror using a mirror screen protector. So I made this frame kit for it.
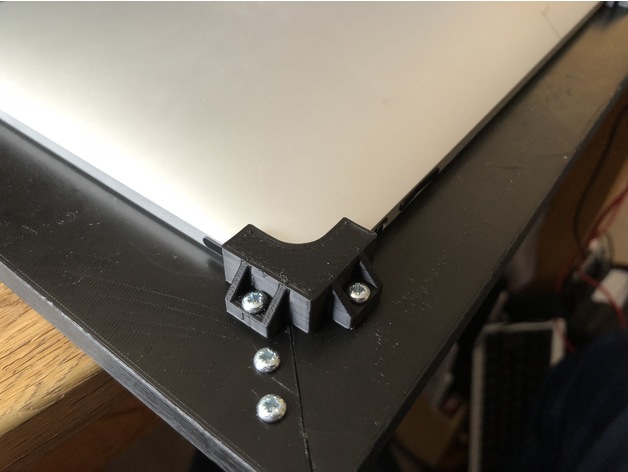
For those with good carpentry skills you can make the frame out of wood and use the brackets (and other kit accessories) to affix the ipad to the frame. The brackets were designed around the iPad 1 and secures the iPad to the frame while allowing complete access to all buttons. (If you are making your own frame I have used an internal window dimension of 234x170mm ). Otherwise I have included a 3D printable frame to use.
It’s not an easy print and the quality of the print will depend on your printer’s capabilities and your printing knowledge and experience. Also have a look at the printing notes for tips.
Note: The frame is symmetrical, you will need to print 2xLongSide and 2xShortSide pieces to make the frame.
Note: Screws are 3mm x 10mm self tapping pan head screws. B&Q Link
For the smart mirror app I made my own (as seen in photo), how ever you can download a clock or weather app instead. I will try to get my app publised (eventually – if they still publish apps for ios 5.1.1). Otherwise the ipad can be used normally to access any other apps.
Print Settings
Printer Brand:
Prusa
Printer:
i3 MK2S
Rafts:
No
Supports:
Yes
Resolution:
0.4
Infill:
25% (Triangle)
Notes:
The hardest piece to print is the long edge side frame. It just fits on the Prusa Mk2s build platform when arranged diagonally. There is very little clearance and a bit tricky to align properly. You need a printer that is properly square and can reach the full build area.
To make it fit to the build area in Cura you need to set the adhesion settings to brim (2 or 3 lines). This also helps to keep the pieces from warping – the pointy corners are difficult to keep down without a brim. Brim is easy to remove with a deburring tool.
The brim may also cover some holes during print. You can carefully cut away these closed holes with a sharp knife. It also means you only need to makes the holes you intend to use.
Tip: If using Cura you can achieve finer control of rotation by holding down the shift key.
Tip: If you’re having trouble getting the full build area in Cura try these settings:
adhesion type = brim
travel avoid distance = 0
horizontal expansion = 0
support horizontal expansion = 0 (if support is enabled)
draft shield disabled
ooze shield disabled
infill wipe distance = 0
How I Designed This
The inside of the frame has been size to give maximum glass surface (for a bigger mirror) while also allowing access to the home buttom and ambient light sensor. The premade bracket holes and included brackets center the ipad. The frame has been designed using a tenon and mortice (tongue and groove?) to secure the pieces together. I have allowed 0.25mm clearance and should allow a tight fit. If its too tight use a file to file down any high spots. Once slotted together the screws should hold the frame together securely.
Tip: It helps to assemble all 4 sides of the frame together by sliding the pieces together a little at a time and working your way around each corner until they are completely seated.
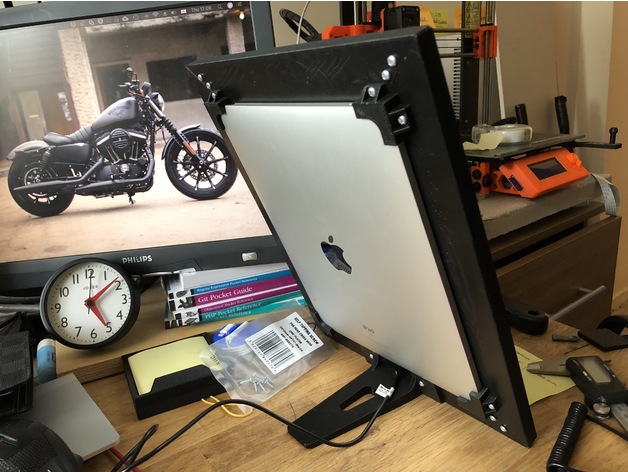
The stand allows clearance for the USB connnector (mine isn’t original so your mileage may vary). The stand only supports portrait mode and does not fit to the frame if you try to mount it landscape mode (I’ll get around to making this piece later). You may want to print this piece with a thicker shell and infill as it supports a fair amount of weight as well as heavy handed screen tappers – this should reduce the amount of wobble.
I have included some hangers for those who want to mount it to the wall – although I haven’t tested these in real life – so use at your own risk. I have included a top and bottom piece. They seem a little short but I designed them this way to allow unobstructed access to the power and volume buttons whichever way you decide to mount it. The bottom hanger allows clearance for the USB connector. You can also attach either these to the long side of the frame as well if you want to mount it in landscape mode, or if you just want more stability.
Tip: You don’t need to use all the screw hook holes, I just put in a few extra for flexibility.
Credits:
khominhvi
Download 3D models
| File | File size |
|---|---|
 Original_iPad_Smart_Mirror_Frame_Kit
|
636 KB |