
I’ve been wanting to do a project like this for a while now, and I started trying out some things with it, but then I got distracted with work and everything and put it on hold. Then I saw Makerbot’s Catch The Wind challenge the other day and decided it was time to go back and actually make something of this.
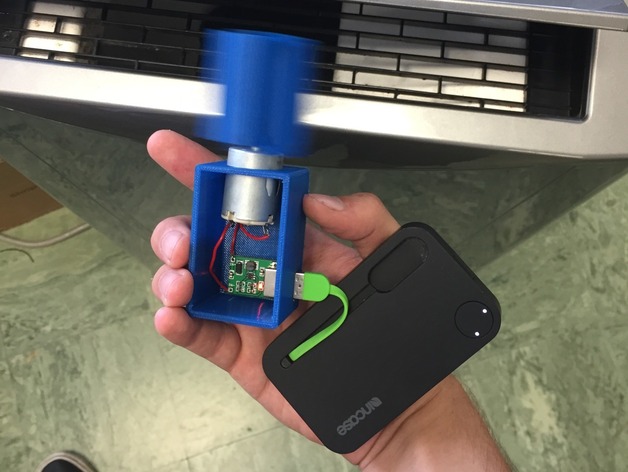
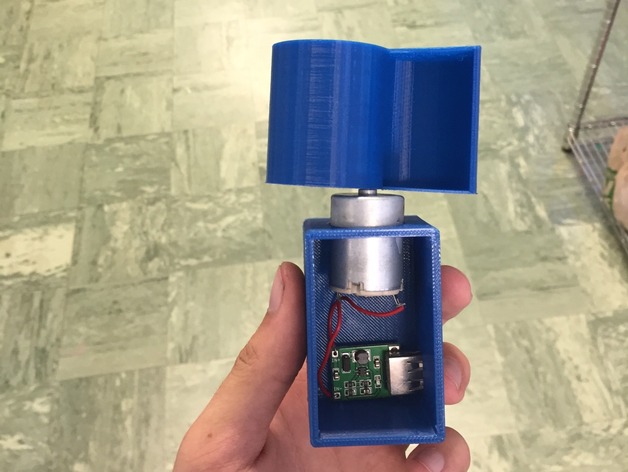
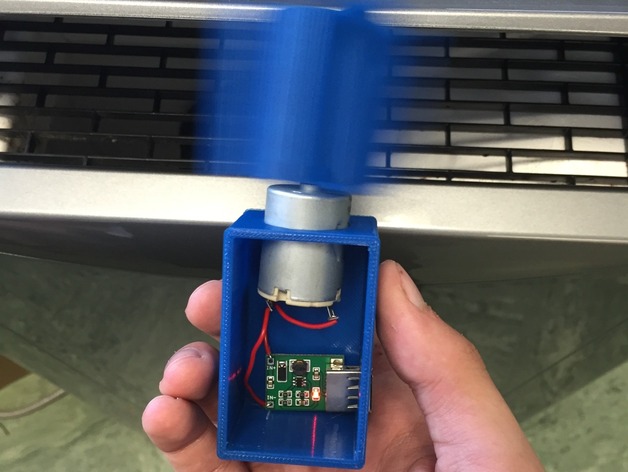
Basically it’s designed to be a wind powered USB charger. It harnesses the power of the wind, and uses a small motor to turn it into electricity. For those who don’t know, motors and generators are essentially the same devices. If you put electricity into a motor it will spin the shaft, if you spin the shaft of the motor yourself it will put out electricity. So this design uses the power of the wind to spin the shaft of a motor, and then I’ve designed it to allow the electricity to run to a USB port on the side of the box.
This was designed to fit two other specific pieces. I’ve put the link to where those two other pieces can be purchased in the instructions, but since it’s a work in progress still, I might change the parts as I experiment with new ones, but I have still gotten it to work as is.
I have a portable battery charger, and when I leave this sitting next to my AC it charges it. I’ve learned that this won’t be able to directly charge an iPhone. Iphones have a built in mechanism that prevents them from being charged like most other USB devices.
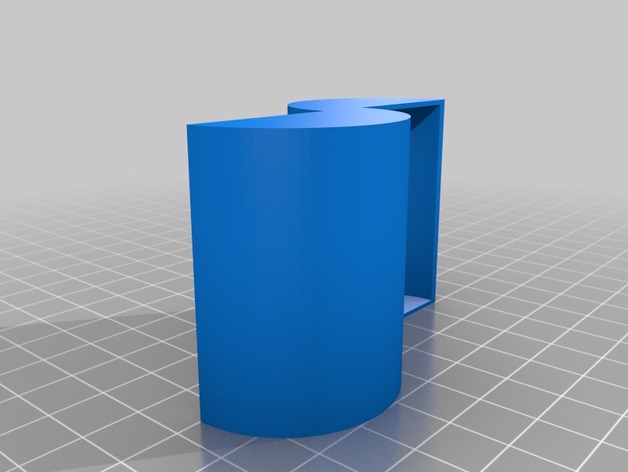
I’ve experimented with a few turbine designs, but from previous experience, I’ve found Savonius cups tend to work best at smaller sizes like this since they tend to require a smaller amount of wind to start spinning, and they’ll only spin in one direction.
As I’ve said, it’s still a work in progress, so I have some work to do. Things I’m thinking of doing include:
-A lid, which I’m working on right now, and will have done pretty soon.
Fits for more kinds of motors
Different boxes that can be attached to other things like a bike or maybe even a car since those will have a lot of wind resistance while they’re moving.
Possibly a gear system since the output is a little lower than I’d like. This’ll take some time though since I want to make sure I get a good ratio that doesn’t make it too much harder to spin. I’ve also ordered a voltage regulator, so my hope is that I’ll be able to incorporate that into the design and then easily regulate the output from there. I will of course update the design if that pans out.
I’m also planning on making a hand cranked and a solar powered version, but those will be separate things. The solar powered version will be an easy change, but the hand cranked version will require gears to get any meaningful power of it, so I’ll have to do some more modifications to it first.
I am of course open to suggestions, especially when it comes to the electronics, there’s a few parts I’m going to order that I want to experiment with too in order to see what works best. I didn’t upload STEP files though since this is a contest entry. I definitely will once the contest is closed though so that people who know more about this than me can help improve it.
UPDATE:
So I uploaded a second turbine design. It’s almost identical except the motor fit for it is tighter. I realized my printer bed was a little close, so the first layers were a bit messy, and that’s why I needed the hole as big as it was. After spinning for a while though it would break off the little pieces and the turbine would spin on the shaft instead of spinning the shaft like it should. I’m keeping the old one up there too though, in case your printer is a little less precise. Turbine Savonius Cups is the newer tighter file.
UPDATE 2:
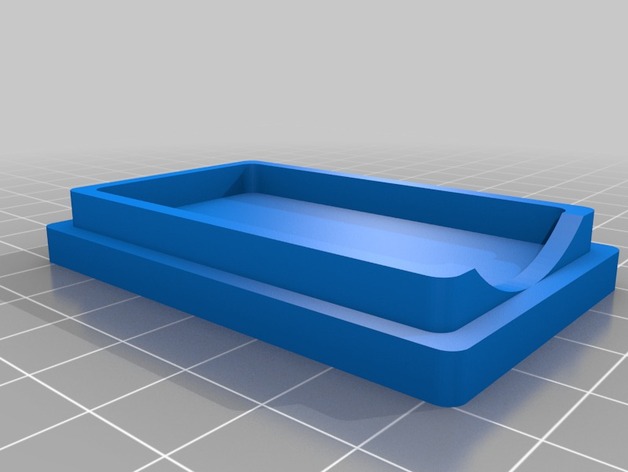
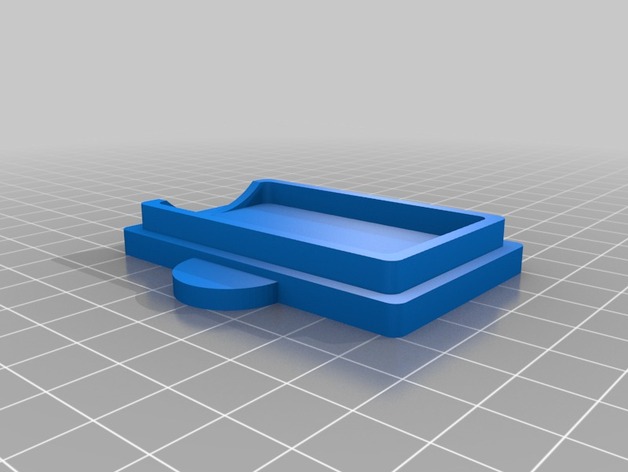
I’ve finished the lid.I was distracted playing around with some other projects and stuff, but I finally put it up. It’s a friction fit and it should just slide in no problem. I made two though, one with two side fins to make it easier to pull off, and one without the side fins. I’ve also tried another USB port that I’ve been testing all day, and it works well so far, I’ll link to it in the instructions.
WARNING:
My knowledge of electronics if amateur at best. If you leave this connected to a phone or something for too long it might melt, or explode, or turn into a Decepticon. I really don’t know, so use it at your own risk. I’ve had a portable charger hooked up to it for a while now though, and so far it’s been fine. The voltage this produces is pretty low, so I don’t think it’s dangerous, but just in case, I want to avoid liability.
Instructions
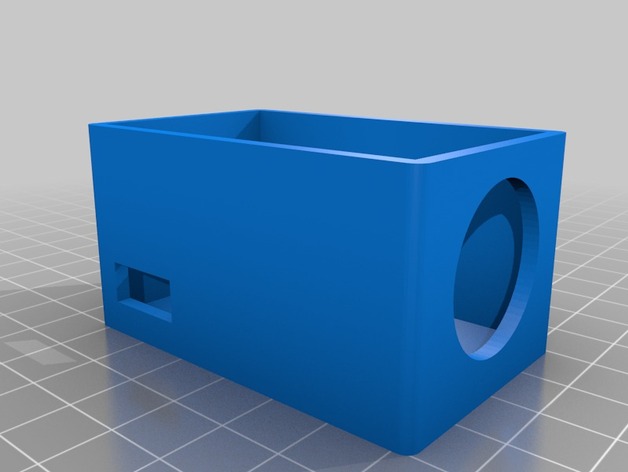
Everything should print as is. I used a Makerbot Rep 2 for these, and I didn’t need any supports or rafts. The top of the Savonius cups were a little stringy, but I just cleaned it up with some pliers and it was fine (I also printed it on a mini, and it was much less stringy). There’s two savonius cup files. “Turbine Savonius Cups” is newer and the hole is a bit tighter, I kept the old one (Just called “Savonius Cups”) up just in case your printer, like mine was, is a little messy and needs a slightly bigger hole. I do recommend using Turbine Savonius Cup instead though and just playing around to make the hole bigger if you have to (I didn’t).
I used 5% infill (I would recommend more, but I was doing a lot of prototyping so I just did 5% for the sake of speed. It’s still plenty sturdy though), and .2 layer height.
All of the fits should be fine, however the USB was a little loose. I had to make it that way so that it would fit in, so you’ll need to use a little glue, some tape, or just hold in place with your fingers while you’re plugging it in and out. The motor should fit perfectly, mine slid into place and stayed unless I applied a bit of force. Using a little bit of glue to hold it in place too wouldn’t be the worst idea ever though either.
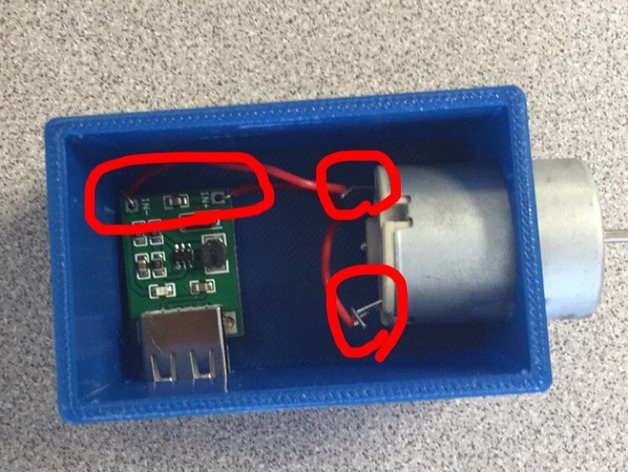
The wiring is simple. Just connect the wire from one end of the motor to one of the inputs on the USB chip. I know the first USB (with the green chip) has a small light that lights up if you blow on the turbine, so that’s how you can tell if it’s connected properly (The second one doesn’t light up with this device, but it’ll still charge). If it doesn’t light up just switch the wires, since the polarity might be backwards. You can see how the wires should go in the picture above.
I’ve found it’s easiest to connect all the wires before putting them into the box, then sliding the USB in through the motor hole before sliding the USB into its slot.
I’ve learned that this will not charge an iPhone though. USB plugs have 4 pins, 2 for power, and 2 for data. Most devices just need power to the 2 power pins in order to charge a device, but iPhones also need to detect 2 volts from the data pins otherwise it just gives you the “Accessory not supported” message. Running the two volts requires that you 1) are generating enough voltage, which this is not curruently; and 2) that you run another circuit and more carefully regulate the voltage going to it. So if you want to charge an iphone with this, you’ll need to run the power to something else first. I use a battery which I will link to below.
As for the other pieces:
This is the motor I used as a generator:
http://goo.gl/tUzfqx
This is the USB port:
http://goo.gl/blXG0y
I’ve also used this USB plug with success. I like the first one better, but if you don’t want to get it as an add-on item you can use this one instead.
http://goo.gl/0gcBcD
This is the battery I’ve been using which I then use to charge my iphone:
https://goo.gl/8yCkEZ
The first USB port is an add-on item with a purchase of $25 or more, so now’s a great time to buy that extra spool of filament you need if you want that. Really any USB port should work so long as the chip fits inside the box. I’m waiting for more that I’ve ordered to arrive to try out though too, so I’ll let you know for sure. These were just parts I had extras of, but I’m sure there are better ones, so I’ll keep experimenting, and I am open to suggestions.
Credits:
TheSoup
Download 3D models
| File | File size |
|---|---|
 Portable_WInd_Powered_USB_Charger
|
79 KB |