
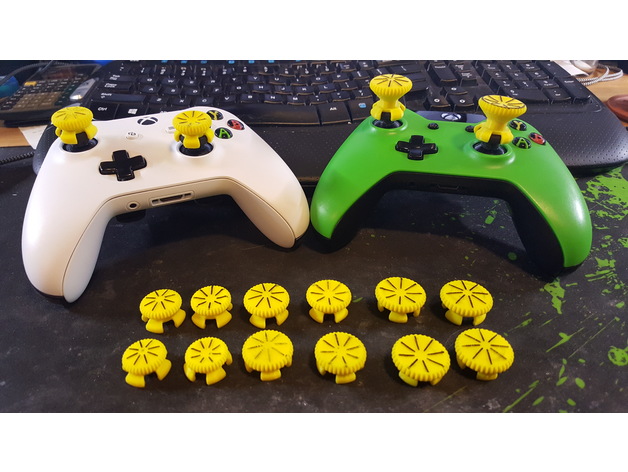
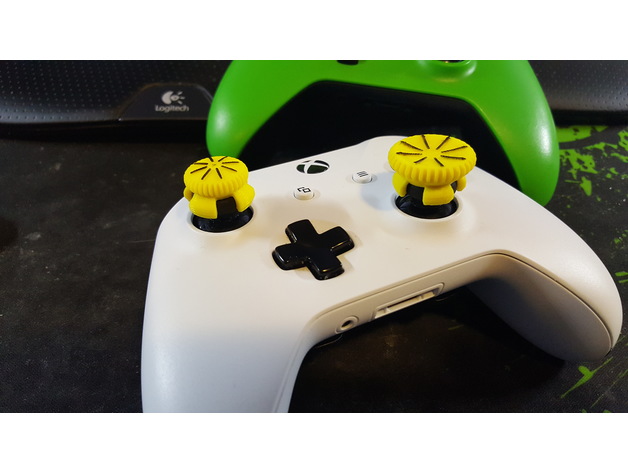
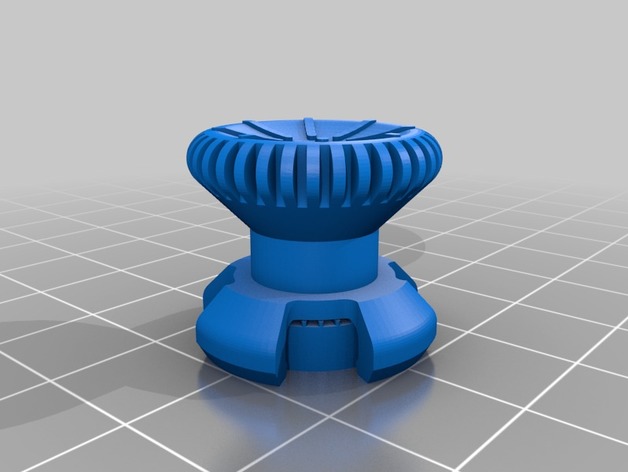
Version 03 Thumb stick for a standard XBOX ONE controller.
This thumb stick design has different Cap Diameters and lengths. I also wanted to go back to a 1 piece construction, so you can just print it and use it. This has been designed to be 3d printed as the other ones I have done are.
So the the thumb sticks start at a 19mm diameter and go up to 25mm diameter. They also start at a 6mm rise and go up to a 16mm rise. They also come in two different cap designs, concave and convex.
I myself have settled on the 08×21 size and use one concave and one convex.
FILE NAMES:
XO-10×23-CC.stl
XO = XBOX ONE
10×23 = 10mm rise x 23mm Cap Diameter
CC = Concave
CV = Convex
The Thumb sticks just press on your controller and have a very firm grip. I have not had one come off during gaming yet.
The files include a designed support for printing that has to be removed. I just pull it out with a needle nose pliers.
MAKE IT YOURS!!! If you like the black highlights I just used a permanent mark to color the ridges. You also could dip the caps into something like Plasti Dip to get a softer top / color.
PRINTING PROBLEMS??? Please read the Print Settings section.
Print Settings
Printer Brand:
Wanhao
Printer:
Wanhao Duplicator i3 V2
Rafts:
Yes
Supports:
Yes
Resolution:
.100 – .200
Infill:
100%
Notes:
THIS is not a “I’m going to make that my first print!”. You want your printer tuned in to be able to bridge some and printing well to do these.
PRINTING:
I printed these in PLA+ and PETG and both work really well (great layer bonding). Highly recommend you print these at a slow speed (PETG at 1500mm/min is what I used). It was designed and intended to be printed with a .4mm nozzle and with a .2mm layer thickness for the bases.
You can print these without a raft but failure rate is much higher. I’ve tried lots of approaches to printing this and using a raft works almost every time. I included a support with a .4mm tall grooved top and a .2mm gap from the part. I just pull it off with a needle nose pliers easily.
LAYER HEIGHT: I get best results by printing it at .2mm layer height to about the center of the cap and then I switch to .1mm layer height so the cap detail on top is very nice.
SUPPORT BECOMING STUCK TO PART???? If the support becomes bonded to the part, try increasing the cooling fan speed and/or printing at the slower print speed as recommended so the support cools properly before the printer prints over top of it. This also will vary depending on how many you print at a time. With one material I had to increase the fan speed to 100% just on the last 2 layers of the support and 1st layer of the bridging of the part to get it to work.
Credits:
Pigworthy
Download 3D models
| File | File size |
|---|---|
 XBOX_ONE_Thumb_Stick_Controller_Extension_Ver3
|
34 MB |