
It all started with the paracord keychain I had before I’ve got my hands on a 3d-printer. For the first several weeks after getting one I’ve been eagerly scanning my surroundings for things I can recreate or improve with my new precious toy. So I laid my eyes onto the keychain.
At first I tried to search our usual sources of models (you know, the websites). Than googled “3d-printed chain” – there was lots of interesting approaches to chains and chain mails (AKA “3d-printed fabric”) models, but nothing fitted my practical or aesthetic need close enough.
So I’ve decided to search in the field of jewelry. I’ve been looking for chain weaving types and patterns, for something adoptable to (ideally) supportless printing. And it was the “Franco”-type keychain that ringed all the bells.
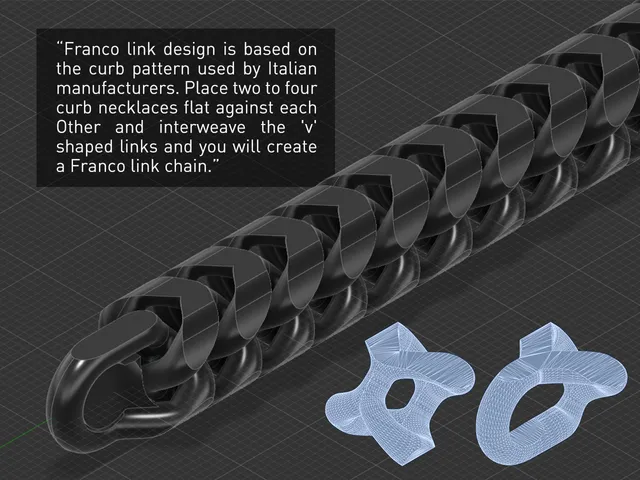
“Franco link design is based on the curb pattern used by Italian manufacturers. Place two to four curb necklaces flat against each Other and interweave the ‘v’ shaped links and you will create a Franco link chain.” – easy enough.
Needless to say, 3d-printing is a great technology to create such kind of things. The keychain comes of your print bed in a fully assembled state.
I did not used Fusion 360 at the time, so the first model was created in Cinema 4D, and it was hardly flexible after print. Tweaking the tolerances between the links and printing prototypes kept me busy for some time. But this prototyping really became rapid only when I switched to parametric modeling (Fusion 360 in my case). And it took some time to get familiar with the new software before I was able to model this keychain in it.
Now, this is a fairly straightforward print. The two needed supports are included in the model. The only thing you should carry for is the good adhesion. May the “skirt” be your last resort if there’s no other way for you to stick that thin to the print bed.
I’m still hoping to get the fully printed version of it, and little by little working on my carabiner design.
I’m curious to see your results.
Print instructions
Ensure you have good print bed adhesion for this one. I’ve got excellent results on a smooth PEI sheet with glue stick.
Also, you might need to turn on the “Lift Z” (Z-hop) option in slicer (Filament Settings => Filament Overrides). I never needed that on Prusa, but it helped on Creality printer.
Don’t forget to enable the “ironing” if your version of slicer already supports it (prints on photos are without ‘ironing’).
Credits:
rtm
Download 3D models
| File | File size |
|---|---|
 franco-keychain-print_files
|
4 MB |