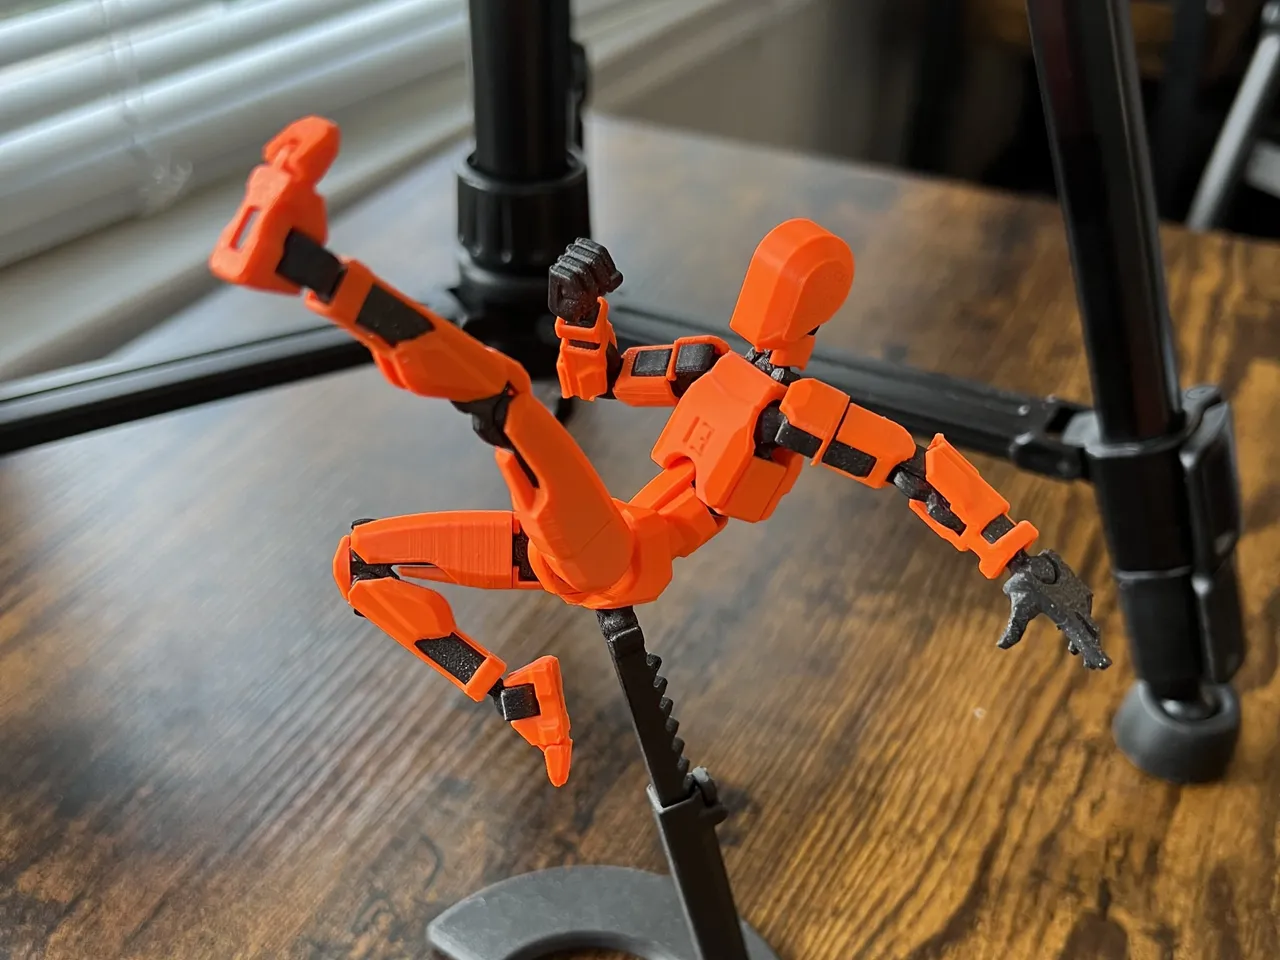
Please read before printing:
This is a work in progress. It has been collecting virtual dust while I work on other projects, so I’ve decided to release it now in a “beta” state.
I don’t have a timeline for when the final version will be finished, but the current files are fairly complete – just lacking some perfectionist polish. Please understand that there is some room for improvement here. I welcome your feedback to help make this design the best it can be.
What’s finished right now: Design of all parts, except for minor tweaks based on feedback. Basic instructions.
What’s not finished: Parts on runners for better adhesion without brims. More detailed instructions. Fusion 360 and STEP files for club members. Any updates based on feedback.
Introducing Dummy 13!
(…working title.)
This is another variant on Lucky 13, and I actually started designing it before Mini 13 or Easy 13. As you can probably tell, my goal here was to bring some more humanlike proportions to the figure, while also improving the way everything fits together.
My hope is that this will be an easier print than the original Lucky 13, though still a step up from Mini and Easy.
Printing
As with the original, Dummy 13 is made up of an inner “frame” with a layer of “armor” over top. You can use the material of your choice for the armor, but you should print the frame with a strong and sturdy material like ABS, ASA, or PETG. I mostly use ASA.
PLA is not recommended for the frame. If you print the frame in PLA and complain that it broke or went floppy, I’m going to be like, “yeah dude, I told you not to.”
All parts print without supports and you should not need to reorient anything. Bed adhesion is the toughest part of this print. For better adhesion try slowing down your first layer, printing external perimeters first, and adding a brim if needed. Use 0.15mm layers (0.2mm first layer).
You can use the included 3MF files with pre-plated parts, or arrange the individual parts yourself. If a part starts with “2x” or “4x,” print that many copies. There are also a couple extra bits (a simple staff accessory and an adapter for the display base) that are included separately.
Recommended print settings (100% scale, 0.4mm nozzle)
| Material | Frame parts | ABS, ASA, or PETG |
| Armor parts | Any | |
| Layer height | First layer | 0.2 mm |
| Other layers | 0.15 mm | |
| Infill | 20% rectilinear | |
| First layer speed | 25% of default | |
| Elephant foot compensation | 0.15 mm | |
| Supports | None | |
| Brim | As needed (depends on bed adhesion) | |
| Additional settings | ☑ Print external perimeters first | |
Assembly
Follow this video for assembly instructions. Pay attention – some parts look very similar!
Customizing
Dummy 13 should be compatible with most handheld accessories made for my other designs.
Please make sure to share any remixes under the same Creative Commons license as Dummy 13: CC BY-NC-SA 4.0. You are welcome to monetize your remixes but you must be subscribed to the remixer tier in my Printables Club to do so.
A word on frustration…
I occasionally get comments on my designs from people who have “tried everything” to get a good print, with no luck, and want to let me know how I’ve ruined their life.
I get it – you found a really cool model, you were really excited to try it, but there are so many little parts and things keep going wrong. If you find yourself here, please wait a moment before leaving a nasty comment. I’m a human too. Pause and proceed with kindness.
But please do leave a comment! Tell me exactly how things went wrong and what isn’t working. Make suggestions. I want to make this design the best it can be, and that means listening to your feedback. Be constructive and I’ll be receptive.
Credits:
soozafone

