
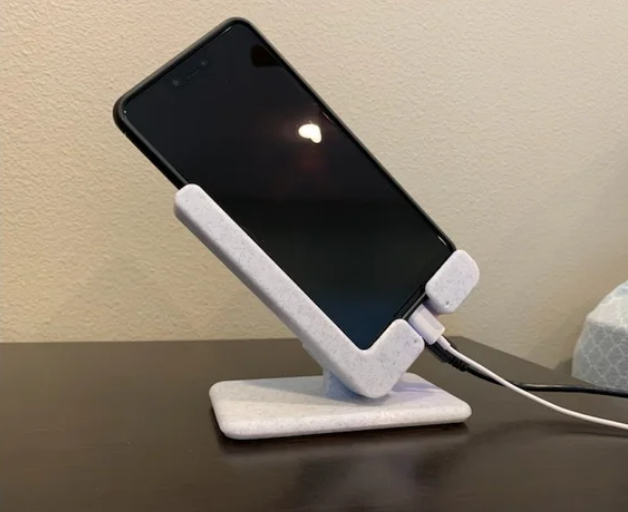
I build this qi charger so I could charge while viewing on my night stand.
I uploaded two sets of stls. One is the original you’d use if laying on your right side while viewing. Those named with ‘left’ are the opposite(what you’d print if laying on your left).
Gap for USB-C headphones. There are two versions of the base. One with a ten degree tilt back, which works better for me since this sits on my night stand which is level with my bed(better viewing angle). The other is straight up, perpendicular to the base.
The body slot where the phone sits has a 13mm gap and the qi charger plate within the base is located such that it should work for most phones. Tested on iphoneX and Pixel XL 3.
Materials/hardware needed:
(3) 25mm M3 screws (https://www.aliexpress.com/item/10000150053486.html)
(1) Qi charger board ( https://www.aliexpress.com/item/32997283422.html – order multiple for cheaper per unit shipping )
Super glue (glue back to body for tighter fit if desired – https://www.amazon.com/Bob-Smith-Insta-Cure-Super-Thin/dp/B001NI4JWI/ – this will last you a while 🙂 )
(4) 10mm rubber feet ( https://www.amazon.com/Rok-Hardware-Cabinet-Furniture-Diameter/dp/B00K6RZ9Q2/ – these come in use for multiple projects)
Add electric tape in board location if you don’t want light coming through lighter colored filament prints ( test before final assembly in dark room ). With lighter filament colors, board LEDs (red – power / blue – charging) will show through which you may or may not like.
(1) USB Type-A to Micro Type-B ( https://www.monoprice.com/product?p_id=4867 )
I like that I can just drop my phone into the cradle to charge without paying attention to lining up on my flat qi charger.
Body was designed to be shorter for easy phone removal.
Assembly
- qi charger board presses in to place. A few dabs of hot glue will help keep the board in place (not necessary but a nice to have). Avoid gluing next to USB connector as there are holes in it which the glue can squish through ( don’t ask how I found out ) :).
- rotate qi charger plate so conductor on top of coils sits in recess in body when assembled.
- you can place a few drops of super glue on body or back to glue halves together for a more solid build (my pic shows a gap as I didn’t do this yet and was just test fitting things )
- All three m3 screws self tap
Printer: Other
Rafts: No
Supports: Yes
Resolution:0.2
Infill:15%
Notes:
Supports only needed for body.
These support settings in prusa slicer made for easy/clean to remove supports for the body(thanks to Muppet Labs on Prusa forums):
0.25mm z distance
75% xy distance
3mm support spacing
4 interface layers
0.2mm interface layer spacing
Credits:
jurassic73
Download 3D models
| File | File size |
|---|---|
 +Holder
|
3 MB |