
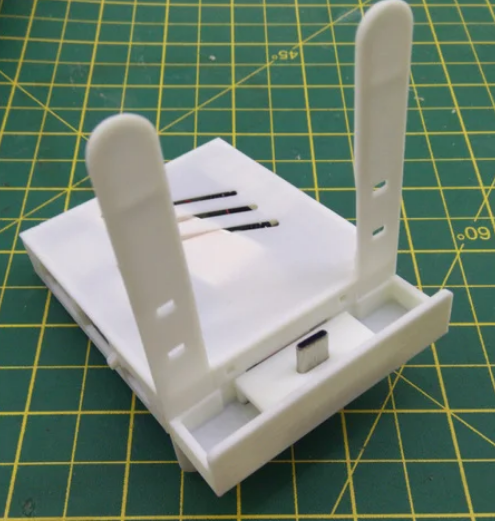
My take on a case mod for the Nintendo Switch’s dock. My design uses detaching legs to allow it to fit a small footprint, whilst giving the switch good support when in use. Snaps together with no glue or fasteners. This modification is 100% reversible. Because the legs stand the switch up at an angle, this can also be used as a playing stand when not plugged in.
This design is intended to go alongside the very compact Mu One USB-C charger, allowing the full kit (minus HDMI cable) to fit easily in a typical switch clamshell. This allows you to bring everything you need to a friend’s house together in a much smaller bag.
The Plug Mount needs to be printed at 0.1 layer height for the clips to work correctly.
Print Settings
Printer brand: Creality
Printer: Ender 3 Pro
Rafts: No
Supports: No
Resolution: Layer Height 0.2, Line Width 0.4
Infill: 100%
Filament_brand: any
Filament_color: White (or other light colour)
Filament_material: PLA
Notes:
Print two of the legs, and one of each other component. The Top Shell and Plug Mount models will need to be flipped over to lay flat. Make sure Print Thin Walls is ON. !!! Layer height can be 0.2 for most components, but 0.1 is needed for the small Plug Mount.!!! A line width of 0.4 or smaller is needed for the fine details of this print. This print has some fine details that are crucial for it to snap together correctly. Your printer should be well calibrated and tuned before printing this. I recommend using a First Layer Horizontal Expansion of -0.1mm, to ensure the port mount will clip in easily. I recommend printing in white or a lightly coloured material, to allow the LED to shine through.
Assembly Instructions
Disassemble your switch dock, keeping the main board, LED board, ribbon cable and connector module. Save the springs, screws and shells just in case you want to reassemble it. Plug both cables into the main board, wrapping the ribbon cable over to the top of the board. Place the board on the pegs inside the Main Shell, orienting it so that the ports line up with their slots. Twist the red and black cables, and push the LED board into the slot at the back, with the LED (small white cuboid) down and facing into the outside wall. This is a friction fit, so it will take some force. Fit the connector module into the Plug Mount, with the ribbon cable out the open side. Carefully bend (don’t crease!) the ribbon cable over itself so that it will fit on top of the main board. Remember that this part should have been printed with 0.1mm layer height. Push the Plug Mount down until the legs click into the corresponding holes in the base of the Main Shell. Starting at one end, align the holes in the Top Shell with the pegs on the Main Shell, then push down at the other end until it all clicks into place. To set up the legs, slide the flat center of the leg into the slots from the side, with the ridges facing toward the back. then slide the leg up until it reaches the end-stop. To store the legs, use their holes to clip them to the pegs on the sides.
Credits:
swiftharmony
Download 3D models
| File | File size |
|---|---|
 Minimized+Switch+Dock+with+Legs
|
900 KB |